- Inicia sesión in your Opi account
- To add a new survey, click + New Survey from the top menu.

- Name your survey.
- Add the maximum number of responses you want to receive.
- Place the start and end date range in which your survey will be active.
- Enter the domain name, this will be used to share and identify your survey. (it will always have .opicx.com at the end)
- Upload an image to display in your survey.
- Finally, save the changes by clicking the button Save Changes on the bottom.

With your Opi account you can add various types of questions to your survey to get the information you need.
- You go to the section My surveys and in the survey that you want to edit, select the option Set up in the action bar.

- Within the configuration of your survey you go to the Questions section in the upper submenu.
- Select the Add question option.

- Enter the question and select the type of question among the 14 options that Opi offers you.
There are different types of questions in your survey, for example:
- NPS: It is a score calculated from a question that is sent to customers to find out if they would recommend your brand
- CSAT: It is an indicator of customer satisfaction that is measured through a survey
- CES: It is a customer experience metric that measures the effort it takes your customer to complete a transaction.
- You can choose if the question is mandatory or not.
- Select if the question is unique to a location, to identify where the data is coming from.
- You can add logic breaks, this helps you to direct the questions according to our established parameters. With this option you can redirect the responses of a question to another selected question or terminate the survey.
- You can upload an image to a question to make your survey more visual. The following image files are supported: jpg, png, and gif.
- Within the settings of your survey select the option Style.

- You can change the colors, the font, the footer, the logo of your survey and many other options.
- Within the configurations of your survey you go to the option of Settings in the top submenu, you may need to navigate using the arrows to get to this option.

- In the Redirect Link section, you place the URL to which you want to redirect people who complete your survey. You need an Individual plan or higher to use this feature. See all plans.
- Within the configurations of your survey you go to the option of Share in the top submenu.

- Within this option you have several options to share your survey. You can share it through a customizable link, you can also download a QR code and use it even in print media or you can create a campaign to send your survey to an email list en masse.
- Within the settings of your survey, in the Contacts option you will find the necessary options to configure the emails for the mass mailing of your campaign.

- Download the sample file within the Contacts option to obtain the minimum fields needed to upload contacts.

- These are the minimum fields required for contact creation:

- Once your list of contacts is ready, upload your .xlsx file from your computer, in this way your contacts will be added to the database of your survey.

With this option you can share your survey to an email list in bulk.
- Within the configurations of your survey you go to the option of Share in the top submenu.

- Then you select the option go to campaigns to begin the process of creating a new campaign.

- Place the name of the campaign and the description of it, after having it ready we give to Save.
- You have the option of creating different campaigns for the same survey. This is useful to be able to send a survey to different groups of emails.
- You must have a contact list uploaded to your survey database in order to continue. See how to add contacts to a survey.
- To customize your email campaign select the option Template, within this option you can give your campaign a name and description, you can also customize it to your liking and add content.
- To add a contact list to a campaign you must select the icon
 .
. - When everything is ready with our campaign to send it, we must select the Send option and fill in the necessary fields to identify and finally send your campaign. You can also schedule the delivery of your campaign for a date up to 3 days later.
When you build a survey with Opi, the survey link (for sharing surveys) by default has Opi's domain, i.e, yourcompany.opicx.com. However, if there is a way to have a custom domain of your choice, mycompanydomain.com like your organization's name or your existing business domain, as the survey URL, it would offer better brand personalization and maintain brand identity.
Custom Domain feature helps you configure the survey URL into the custom domain that reflects your brand.
To configure the custom domain for your Opi account in the SurveyURL, you will need to do the following steps:
Authorize the Custom Domain on Opi:
- Sign in to your Opi account.
- On your account home page, go to My Company. tab Custom Domain.
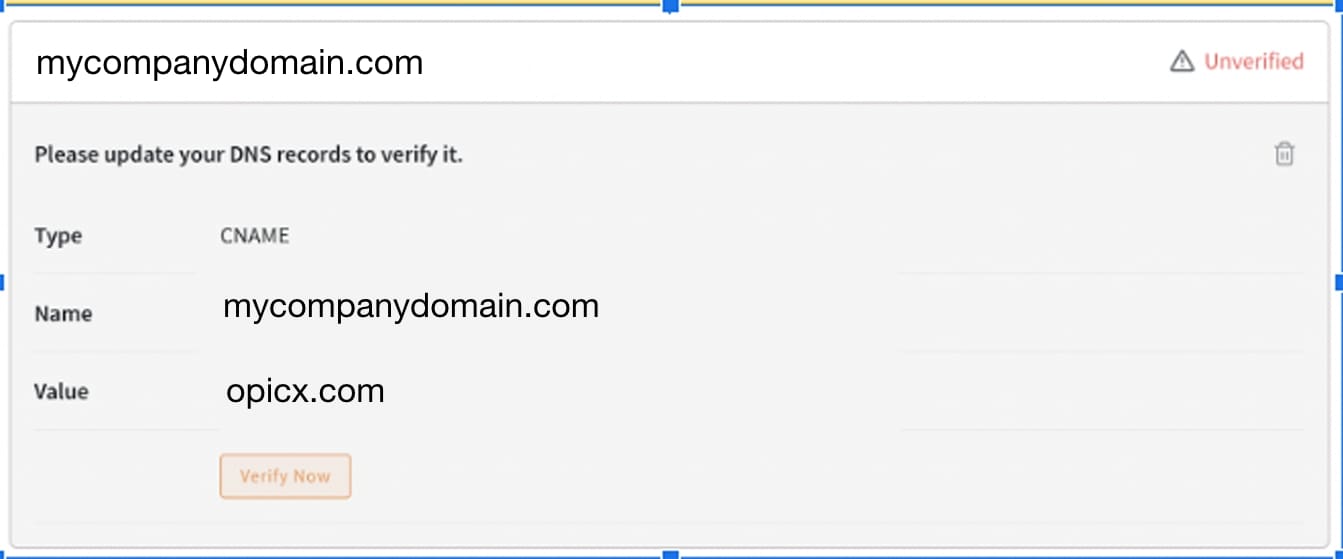
- Here, insert your domain URL in the Custom domain placeholder and hit on Update.
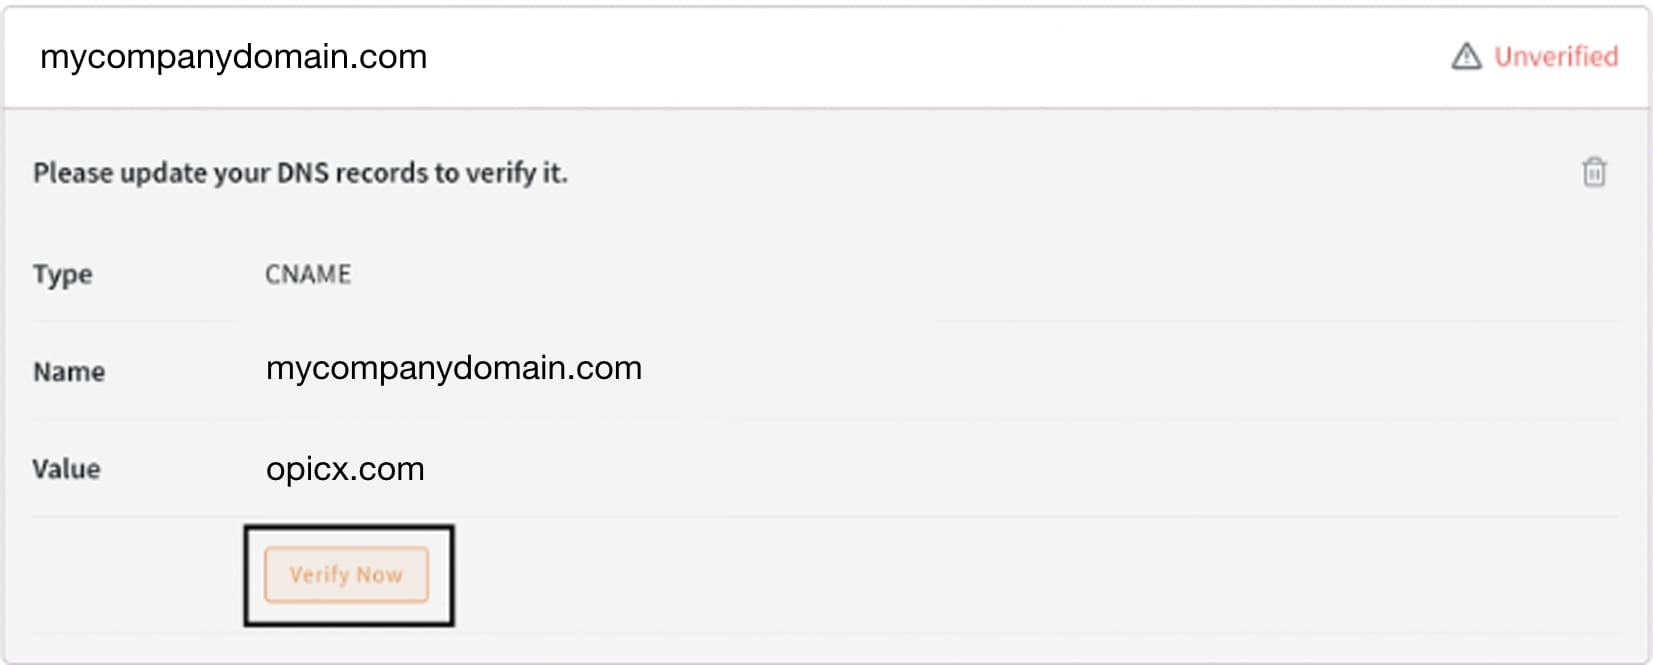
- Make a note of the TYPE, NAME and VALUE details. This will be used to configure a DNS record and point it to your Opi account.
Configure the DNS records in your server:
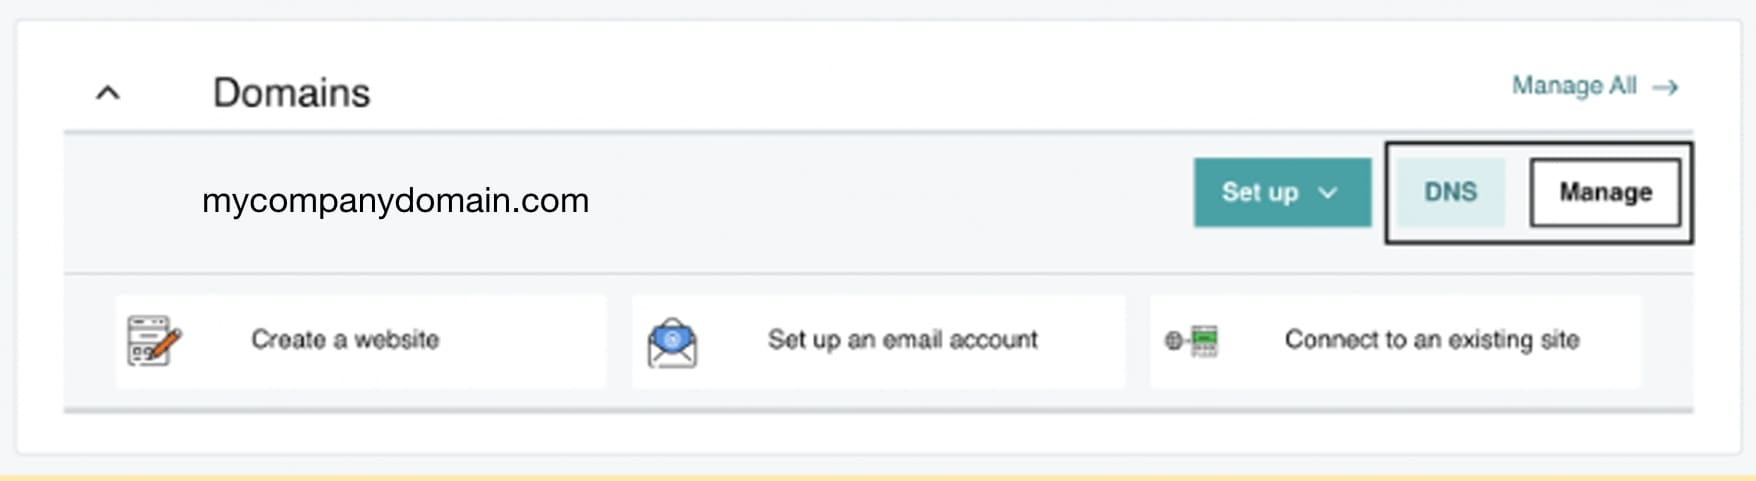
- Head to the domain provider administrator tools and advance to the DNS settings. Select Manage DNS to access your DNS records.
- Under DNS management, there will be DNS records that are already available.
- Add a new DNS record of the type - CNAME.
Note: These above steps might vary based on where you are hosting your domain, please contact your web hosting company for more help. The method however remains the same.
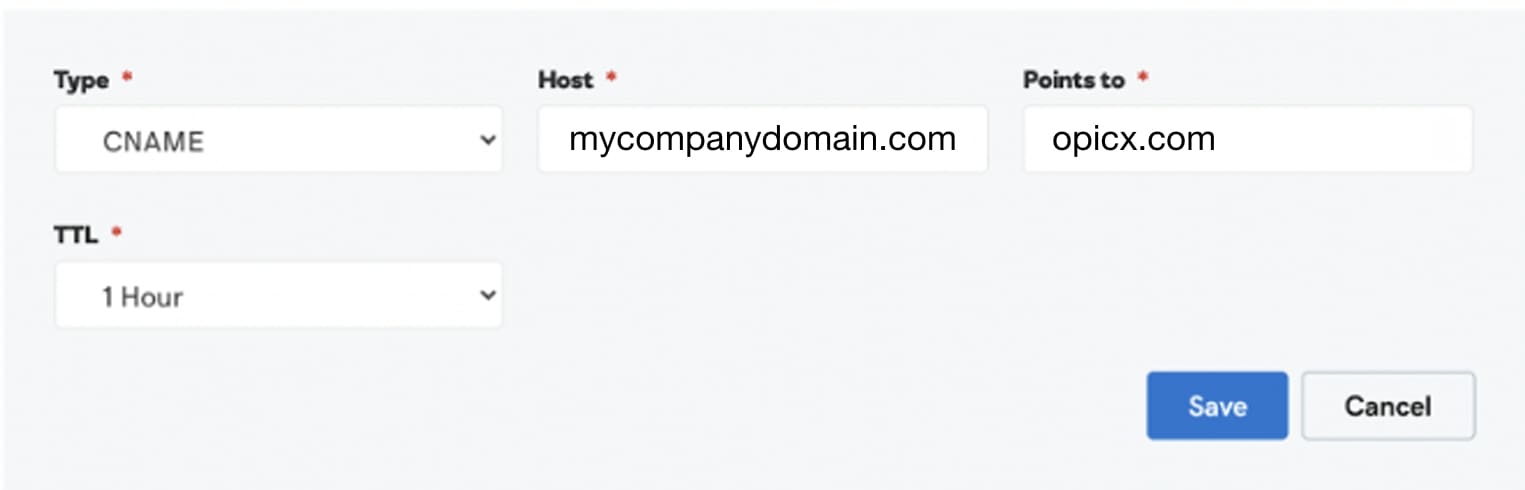
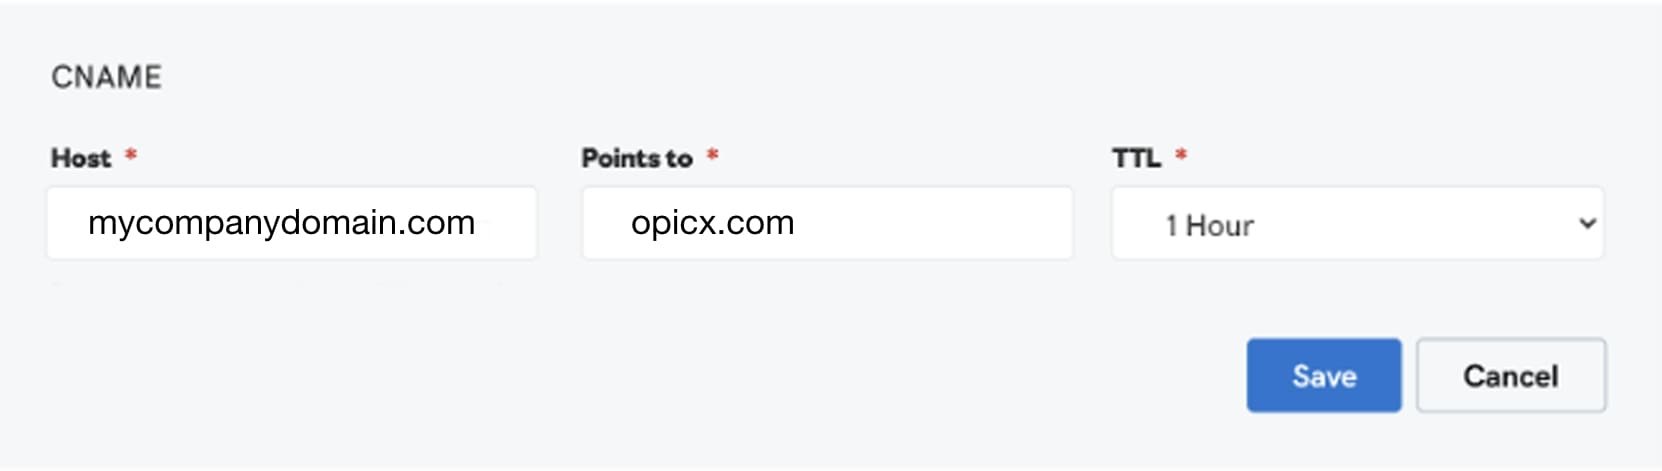
- Enter the Name and Value details copied from your Opi account and Save the CNAME record.
Note:If your Domain Host is asking for a TTL (Time-To-Live), you can enter a value between 30 minutes to 1 hour, or else leave it blank or default.
Please remember that each domain provider will have their own format for entering the host details. Ensure to get that right. Contact your domain host in case of doubt.

- 5. Now you have added a CNAME record successfully and ready to be verified.
- 6. Head back to your Opi account and click on ‘Verify Now’.

Note: Once the above steps are all successful, anticipate a buffer time for the verification to be completed. There could be a certain amount of time before these configurations reflect with your DNS host.
- If the icon next to the URL turns green, your new domain is verified.

- After the verification is completed successfully, your custom domain is ready to be used and your survey URL will now possess your own brand identity and remove Opi out of the picture.
Note: After the verification, the domain URL of your Opi account will still be feedback.opicx.com You'll have to get in touch with your account manager to change the URL to feedback.mydomain.com
That’s it!
To validate this configuration, go ahead and enter your newly added custom domain on the URL bar and verify if this is redirecting you to your Opi account. At the same time, check if the weblinks for the Survey share now contain your business domain. If this is confirmed, the survey can be shared to your audience with the new URL.
Please reach out to us if you have any questions. We are just a chat away!